How to Weld Plastic: A Beginner's Guide

To start welding plastic, familiarize yourself with the properties of different plastic types like polyethylene and PVC, as their melting points and densities vary. Use a plastic welding gun and matching welding rods to bind the pieces effectively. Make sure you organize your workspace with good lighting and ventilation. Select a welding technique suitable for your plastic type; beginners should consider hot gas welding for its simplicity. Avoid overheating to prevent damage, and let the weld cool properly for strength. Wear protective gear and practice with simple projects like repair jobs to build skill. Uncover more to improve your proficiency.
Understanding Plastic Welding
Plastic welding is a captivating process that joins two pieces of plastic together using heat. When you're diving into this technique, understanding plastic properties is vital. Different plastics behave distinctly when heated, so knowing how your material reacts will guide you in selecting the right welding techniques. For instance, some plastics melt at lower temperatures, while others require more heat to become pliable.
You must consider the plastic's density, melting point, and thermal conductivity. These properties determine how quickly the plastic will respond to the applied heat and how strong the final weld will be. Ignoring these factors might lead to weak joints or even damage the material.
When it comes to welding techniques, you have several options: hot gas welding, ultrasonic welding, and extrusion welding are just a few. Each technique has its own set of tools and methods, but they all aim to create a solid bond. By mastering these techniques, you can guarantee a durable and reliable weld. Understanding these fundamentals will not only improve your results but also make the process more efficient and enjoyable. Prepare to investigate the art and science of plastic welding!
Types of Plastic Materials
When you're venturing into plastic welding, it's vital to recognize the variety of plastic materials you'll encounter. Each type has unique properties and applications that affect how you approach welding. Understanding the role of polymers in plastic welding can greatly improve your technique, as different plastics may require distinct approaches, similar to how yeast plays a fundamental role in bread-making.
Polyethylene is known for its flexibility and chemical resistance, making it ideal for containers and pipes. Understanding polyethylene properties helps you adapt your welding technique for best results. PVC, or polyvinyl chloride, is widely used in plumbing and construction due to its durability and resistance to environmental degradation. Familiarize yourself with PVC applications to guarantee proper welding.
Acrylic offers several advantages, such as clarity and light weight, making it perfect for displays and signage. Its welding requires careful heat control to preserve its optical properties. Nylon, with its strong and elastic characteristics, suits high-stress applications like gears and bearings. You'll need to accommodate its thermal expansion during welding.
Polycarbonate is celebrated for its durability and impact resistance, used in safety equipment and automotive parts. Its high melting point demands precise temperature control. Thermoplastic types, including the aforementioned, can be repeatedly melted and reshaped. Fiberglass composites combine strength and lightweight properties, often used in aerospace and automotive industries. Finally, biodegradable plastics provide eco-friendly options, though they may require specific welding techniques to maintain their integrity.
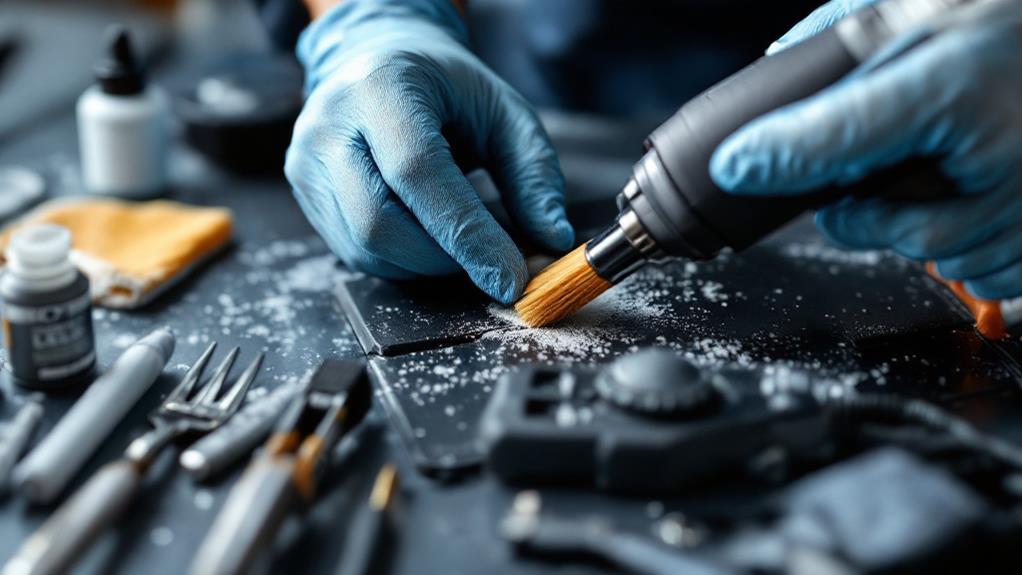
Essential Welding Tools
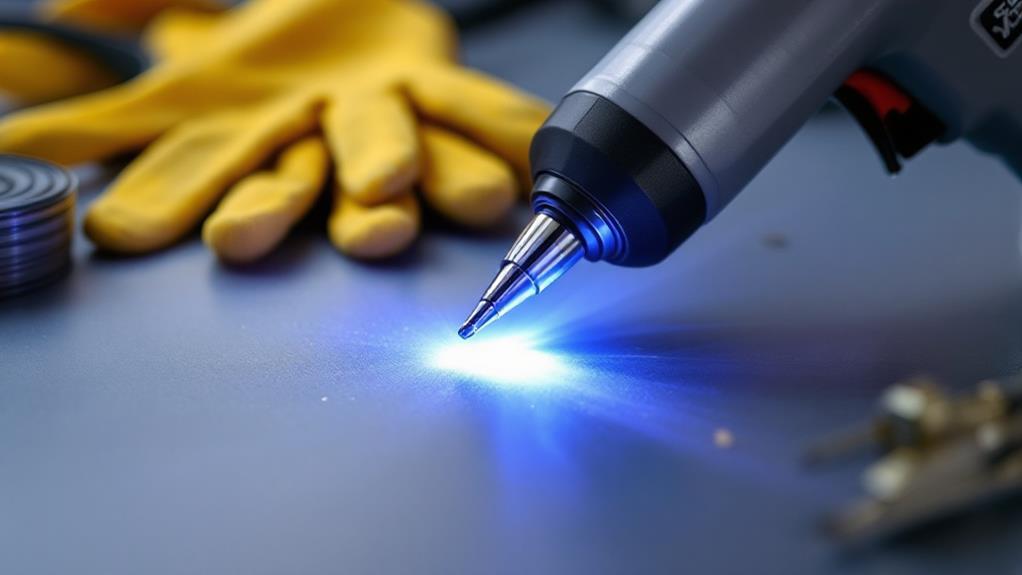
To successfully weld plastic, having the right tools at your disposal is vital. The right welding equipment not only makes the process smoother but also guarantees the quality and durability of your welds. Initially, you'll need a plastic welding gun, an invaluable tool that heats the plastic to its melting point, allowing you to join pieces together. It's imperative to choose a gun compatible with the plastic types you'll be working with, as different plastics require different temperature settings. Moreover, understanding the importance of light in the welding process can improve your comprehensive technique, similar to how night vision goggles amplify visibility in low-light conditions.
Next, consider investing in a range of welding rods. These rods come in multiple plastic types, such as polyethylene, polypropylene, and PVC, and should match the material you're welding. A mismatch can lead to weak or failed joints. A heat gun with adjustable temperature controls is also handy, especially for pre-heating or shaping plastic before welding.
You'll also need a reliable temperature gauge to monitor the heat applied to the plastic, preventing overheating or underheating, both of which can compromise the weld. Furthermore, a pair of protective gloves and safety goggles are non-negotiable to protect you from burns and harmful fumes. With these tools, you're well-equipped to start your plastic welding expedition.
Preparing Your Workspace
Equipped with the right tools, you're ready to focus on your workspace setup, which plays a significant role in successful plastic welding. Having a well-organized and accessible workspace can make all the difference. Begin by designating a specific area for welding tasks, guaranteeing it's free from clutter and potential hazards. A clean, spacious workbench gives you room to maneuver and reduces the risk of accidents.
Workspace organization is essential; arrange your tools so they're easy to reach. This not only saves time but also keeps your workflow smooth. Consider using pegboards or tool racks to store your equipment visibly.
- Lighting: Confirm the area is well-lit to help you see details clearly, reducing mistakes.
- Ventilation: Good airflow is critical to avoid inhaling harmful fumes. Use fans or open windows to maintain air quality.
- Fire Safety: Keep a fire extinguisher nearby, as welding can produce sparks.
Tool accessibility is key to efficiency. Position frequently used tools, like heat guns or clamps, within arm's reach. This reduces unnecessary movement and keeps your focus on the task. A well-prepared workspace sets the stage for successful plastic welding projects.
Choosing the Right Technique
With a well-prepared workspace, understanding the right technique for plastic welding is your next step. Start by considering the type of plastic you're working with, as plastic compatibility is key. Not all welding techniques suit every plastic type. Familiarize yourself with the different types of plastics, like thermoplastics and thermosets, since this knowledge will guide your choice.
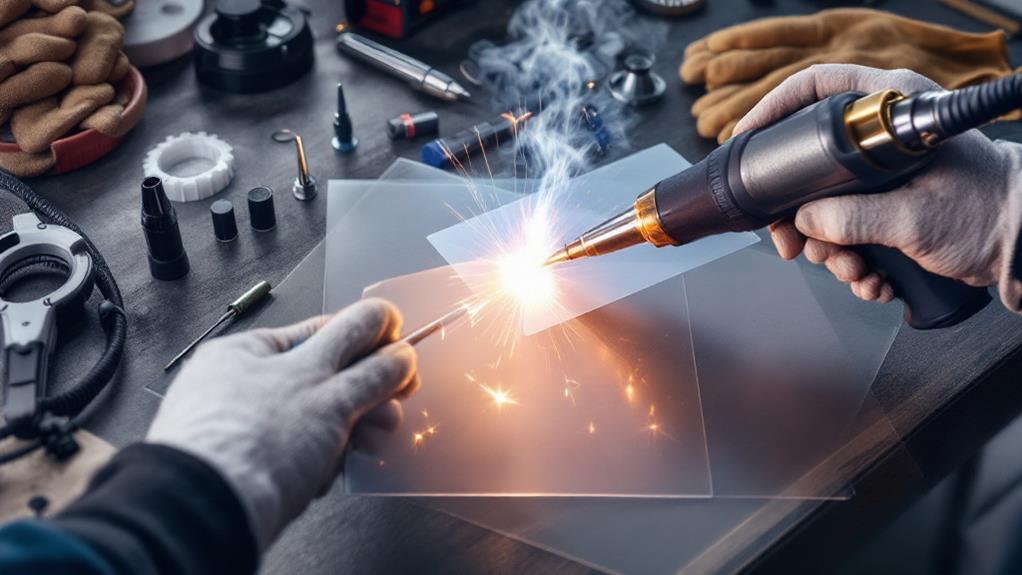
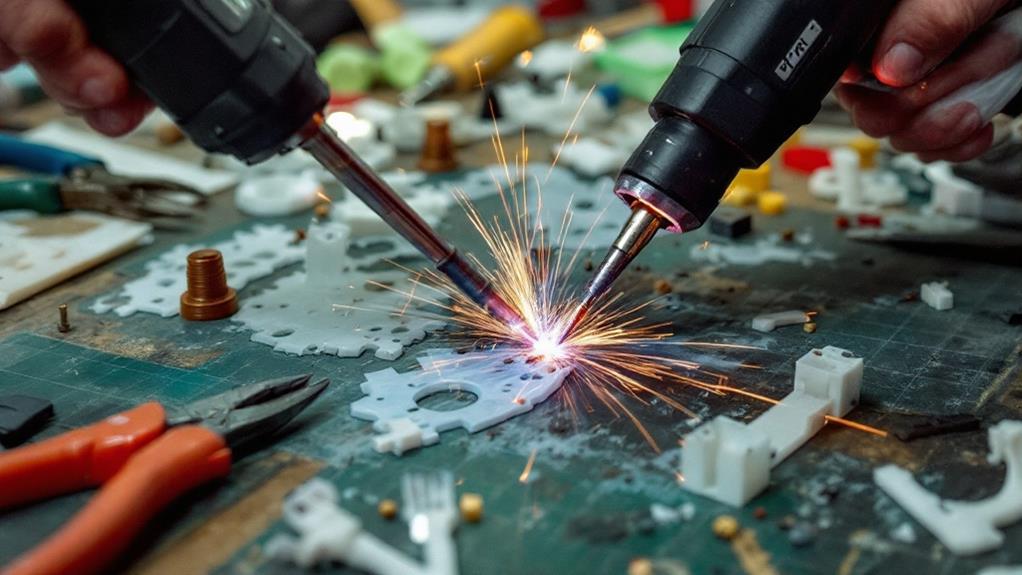
When selecting a welding technique, you've got several options. Hot gas welding is a popular choice for many thermoplastics, using a heat gun to melt the materials together. It's great for repairs and small projects. Ultrasonic welding, on the other hand, uses high-frequency sound waves and works well with rigid plastics, providing strong and clean joints. If you're dealing with thicker materials, extrusion welding might be the right fit, as it delivers a continuous bead of molten plastic for robust joints.
Consider the complexity of your project and the tools at your disposal. Some techniques require specialized equipment and experience, so choose a method that matches your skill level and resources. By focusing on plastic compatibility and the right welding techniques, you'll guarantee a successful and durable outcome.
Step-by-Step Welding Process
Understanding the right technique is just the beginning; now it's time to put that knowledge into action with a step-by-step welding process. Initially, verify you've established your welding parameters. These include the temperature, pressure, and speed settings specific to the plastic type you're working with. Once these parameters are set, you can achieve a strong, lasting weld.
Next, focus on joint design. The joint design determines how two pieces of plastic fit together. A proper design guarantees even distribution of heat and pressure. For beginners, a simple butt joint, where two pieces meet edge to edge, is often the easiest to master.
Follow these steps to begin welding:
- Prepare the Surfaces: Clean the plastic surfaces thoroughly to remove any dirt or oils. This helps in achieving a strong weld.
- Align the Pieces: Position the pieces according to your joint design. Confirm they're aligned correctly to avoid weak spots.
- Apply Heat and Pressure: Use the welding tool to apply heat and pressure according to the established parameters. Maintain consistent pressure until the plastic cools.
Common Mistakes to Avoid
When welding plastic, it's easy to make mistakes that can compromise the integrity of your work. One common error is not understanding the specific plastic properties you're dealing with. Different plastics require different welding techniques. For instance, using a technique suited for polyethylene on polycarbonate can lead to weak joints or even damage. Always check the material's specifications before starting.
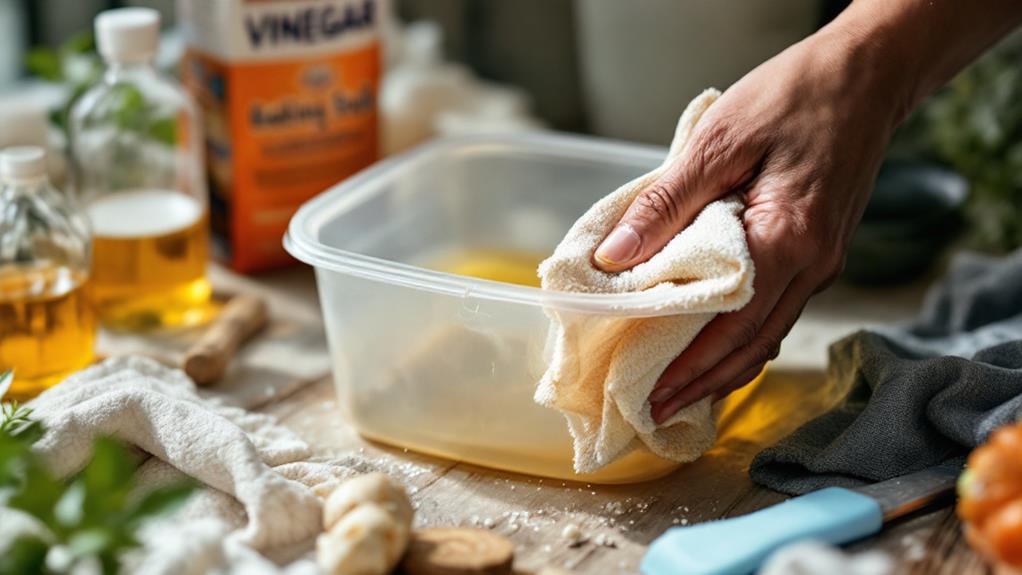
Another frequent mistake is improper surface preparation. Dirty or greasy surfaces can prevent the weld from bonding correctly. Make certain you clean the plastic surfaces thoroughly to achieve a strong weld. Furthermore, neglecting to preheat the plastic can result in uneven welds. Preheating helps make certain the plastic is pliable and ready to fuse properly.
Overheating the plastic is another pitfall. It can cause the material to burn or deteriorate, weakening the weld. Pay close attention to temperature settings and adjust them according to the plastic's properties. Finally, rushing the process can lead to poor-quality welds. Take your time to apply consistent pressure and speed throughout the welding process. By avoiding these mistakes, you'll improve your welding techniques and produce durable, reliable plastic welds.
Safety Tips and Precautions
Guaranteeing safety during plastic welding is vital to prevent injuries and maintain a secure work environment. Begin by wearing appropriate protective gear, such as gloves, goggles, and aprons, to shield yourself from heat and any harmful fumes. Remember, proper ventilation is imperative—fumes released during welding can be hazardous. Make certain your workspace is well-ventilated, or use local exhaust ventilation systems to keep air quality in check.
Organizing your workspace effectively minimizes accidents. Keep tools and materials neatly arranged, avoid clutter, and verify that heat-resistant surfaces are available to prevent fires. Material compatibility is another key factor; using incompatible plastics can lead to weak welds and increased risk of failure.
Before commencing, conduct a thorough risk assessment to identify potential hazards and establish emergency procedures. Knowing what to do in an emergency can greatly reduce harm. Here are some vital tips:
- Training resources: Invest time in understanding welding techniques and safety protocols.
- Heat resistance: Be aware of the heat tolerance of the materials you're working with.
- Emergency procedures: Familiarize yourself with first-aid measures and have a fire extinguisher accessible.
Maintenance and Care
Proper maintenance and care of your plastic welding equipment guarantee longevity and peak performance. Start by regularly cleaning your tools to prevent residue buildup. After each use, wipe down your welding gun, nozzles, and tips with a clean, dry cloth. This simple step guarantees that nothing interferes with your plastic welding techniques.
Check your equipment for wear and tear. Inspect the power cord for any signs of damage, as frayed cords can lead to accidents. If your welding gun has replaceable parts, like heating elements, keep a few spares on hand. This way, you won't have to pause your projects for unexpected repairs.
Confirm your workspace remains organized and free of clutter. Proper storage of your welding tools not only keeps them safe but also makes accessing them easier when you're ready to engage in your next project.
Don't forget to review the manufacturer's guidelines for maintenance schedules. Each tool may have specific requirements to follow, guaranteeing peak performance.
Practice Projects for Beginners
Starting with a few simple projects is a great way to hone your plastic welding skills. You'll find that tackling straightforward tasks enhances your confidence and prepares you for more complex projects. Begin with simple repairs around the house. Fixing broken household items like plastic bins or garden tools is a practical way to apply your newfound skills. These repairs not only save money but also extend the life of your belongings.
Once you're comfortable with repairs, try your hand at creative projects. Crafting decorative items such as customized picture frames or unique plant pots lets you investigate the artistic side of plastic welding. These creations can serve as beautiful art pieces or even DIY gifts for friends and family.
Finally, reflect on functional designs that combine both utility and creativity. Repairing a child's toy can be incredibly rewarding, especially when their favorite toy is brought back to life. As you practice, you'll uncover a world of possibilities with plastic welding. Here are a few beginner-friendly projects to bear in mind:
- Simple repair of household items: Patch up broken plastic containers or garden tools.
- Creative projects for decorative items: Craft picture frames or plant pots.
- Toy repairs and functional designs: Fix a child's toy or create a customized gadget holder.