How to Cut Thermocol Neatly and Safely
To cut thermocol neatly and safely, start by preparing a flat, stable surface in a well-lit, ventilated area. Use crucial tools like a hot wire cutter for smooth edges or a utility knife for straight cuts on thinner pieces. Mark your cut lines clearly with a pencil and score them lightly initially. Keep your workspace organized and free of clutter, and protect surfaces with a cutting mat. Always wear gloves and goggles for safety and verify tools are sharp. Secure the thermocol to prevent shifting during cuts. With these methods, you'll achieve precise, professional results. Let's investigate further techniques for perfection.
Essential Tools for Cutting
In the context of cutting thermocol, having the right tools is crucial for achieving clean and precise cuts. You'll find that different thermocol types, such as expanded polystyrene (EPS) and extruded polystyrene (XPS), require specific cutting tools to avoid messy edges and guarantee accuracy. A hot wire cutter is a top choice for many because it smoothly slices through the material without leaving jagged edges. It's especially effective for intricate designs and thicker pieces, similar to how yeast activity influences dough rise. Alternatively, a utility knife with a sharp blade works well for thinner thermocol types, allowing you to make straight cuts with ease.
For more detailed work, you might consider using a craft knife or a scalpel, which offers greater control and precision, especially in smaller areas. Cutting tools like electric knives can also be handy, providing a clean cut for larger sheets of thermocol. Remember, the key to a successful cut is not just the tool itself but making sure it's well-suited to the specific type of thermocol you're working with. By selecting the appropriate cutting tools, you'll achieve professional-looking results every time. Always prioritize sharpness and quality in your tools to make your cutting tasks efficient and frustration-free.
Preparing Your Workspace
Before you start cutting thermocol, it's vital to set up a well-organized workspace. Choose a flat, stable surface like a large table or workbench to prevent any unwanted movement during cutting. Clear the area of unnecessary items to guarantee you have ample room, avoiding clutter that could jeopardize your focus and safety. The importance of health and nutrition in maintaining a safe working environment should not be overlooked. Workspace organization is key for maintaining efficiency and reducing the risk of accidents.
Next, consider the material selection that you'll need within reach. Gather all necessary tools, like cutting knives and measuring devices, and arrange them neatly so you can grab them quickly. It's also smart to have a cutting mat or a piece of scrap wood under the thermocol to protect your table from knife marks.
Make sure your workspace is well-lit, allowing you to see your cutting lines clearly. If possible, work near a window for natural light or use a bright desk lamp. Good ventilation is vital as cutting thermocol can release fine particles; open a window or use a fan to keep the air circulating. By organizing your workspace and selecting the right materials, you'll set yourself up for a smooth and safe cutting process.
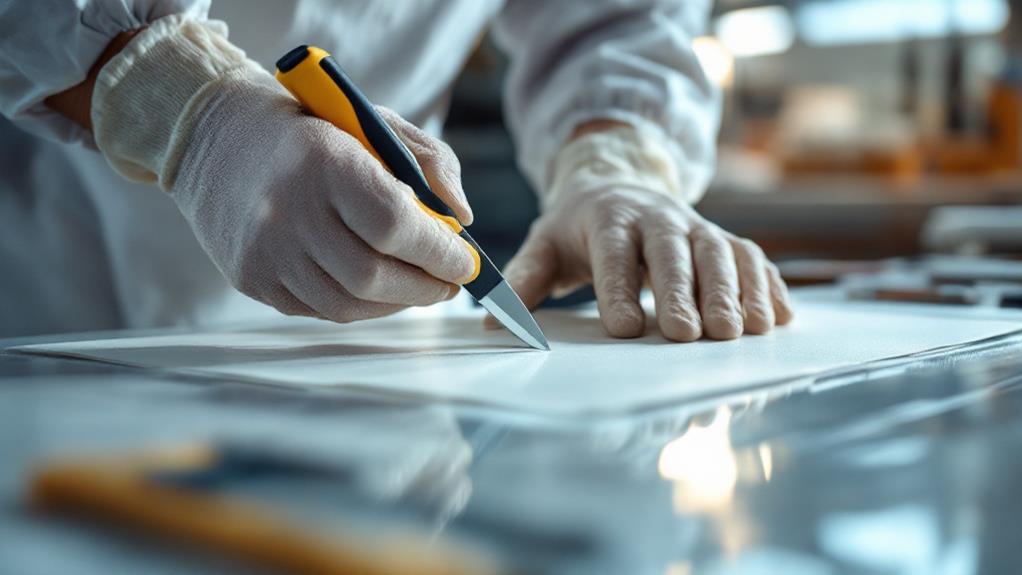
Step-by-Step Cutting Techniques
Starting with the right tools and techniques makes cutting thermocol a straightforward task. Initially, gather your materials: a utility knife for precision, a hot wire cutter for smooth lines, and a metal ruler for guidance. Begin by marking your cut line on the thermocol with a pencil or marker. This will guarantee accuracy and prevent mistakes.
Next, apply the scoring technique. Hold the utility knife at a slight angle and lightly score along the marked line. This initial cut should be shallow, creating a guide for the deeper cut. By scoring initially, you reduce the risk of jagged edges and maintain control over the cut.
For larger pieces, a hot wire cutter is your best bet. Turn on the hot wire and gently press it along the scored line. The heat will melt through the thermocol, resulting in a clean, precise cut. Always maintain steady pressure and a consistent pace to avoid uneven lines.
Remember to keep your hands clear of the cutting path and use protective gear like gloves and goggles. With these step-by-step techniques, you'll achieve neat thermocol cuts every time.
Tips for Smooth Edges
Achieving clean cuts is just the start; ensuring smooth edges raises your thermocol projects considerably. Your focus should shift to edge finishing to give your work that professional touch. Here are some effective smoothing techniques to achieve those sleek edges:
- Sandpaper: Use fine-grit sandpaper to gently smooth the edges. This helps in rounding off sharp corners without damaging the surface. Start with a higher grit and gradually move to a finer one for best results.
- Hot Wire Tool: If you have access to a hot wire cutter, it can be a game changer. Glide the tool along the edges to melt away rough bits, leaving a smooth finish. It's precise and minimizes debris.
- Acrylic Sealer: Apply a thin layer of acrylic sealer along the edges. This not only smooths out minor imperfections but also strengthens the edges, making them less prone to chipping.
- Heat Gun: Carefully apply a heat gun to the edges to slightly melt and smooth them. Keep the heat moving to avoid burns or uneven melting.
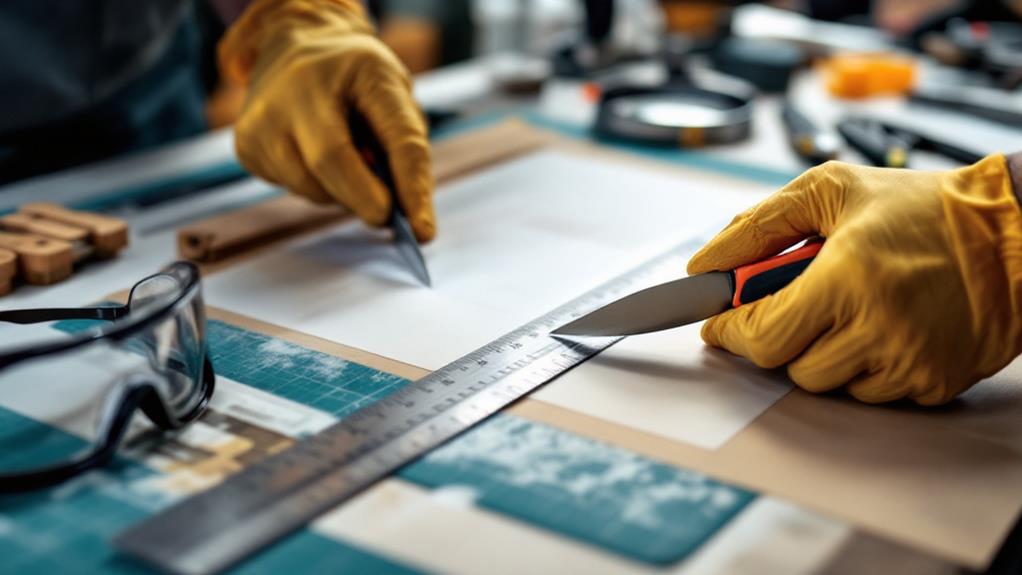
Safety Precautions and Measures
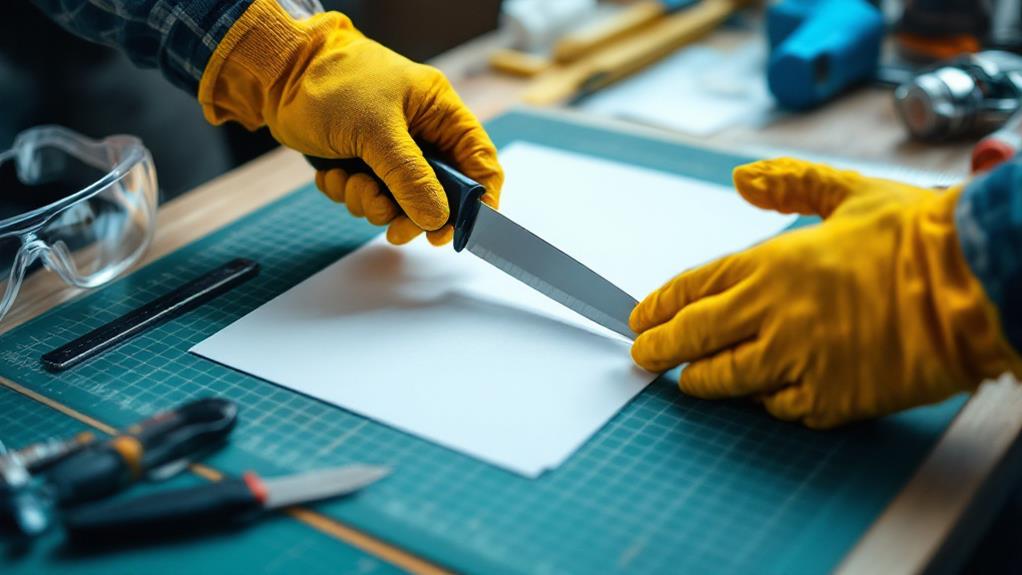
Guaranteeing safety while cutting thermocol is crucial to prevent accidents and maintain a healthy working environment. Firstly, always wear protective gear, such as gloves and safety goggles. This will protect your hands and eyes from potential injuries caused by sharp tools or thermocol particles. Furthermore, working in a well-ventilated area minimizes exposure to any fumes released during the cutting process.
Before you begin, verify your tools are in good condition. Dull blades can lead to slips and uneven cuts, increasing the risk of accidents. Use appropriate cutting techniques, like steady pressure and consistent movement, to maintain control over the tool and achieve clean cuts. Practice on scrap pieces of thermocol before working on your main project to build confidence and precision.
Secure the thermocol on a stable surface to prevent it from shifting while cutting. Use clamps or weights to hold it in place, allowing you to focus on your technique. Keep your work area organized and free of clutter to avoid distractions and accidents. Finally, always unplug electrical cutting devices when not in use to prevent any unintended activation. Prioritizing safety guarantees a smoother, accident-free cutting experience.